7.1.5 Hugging Face 快速上手
核心链路
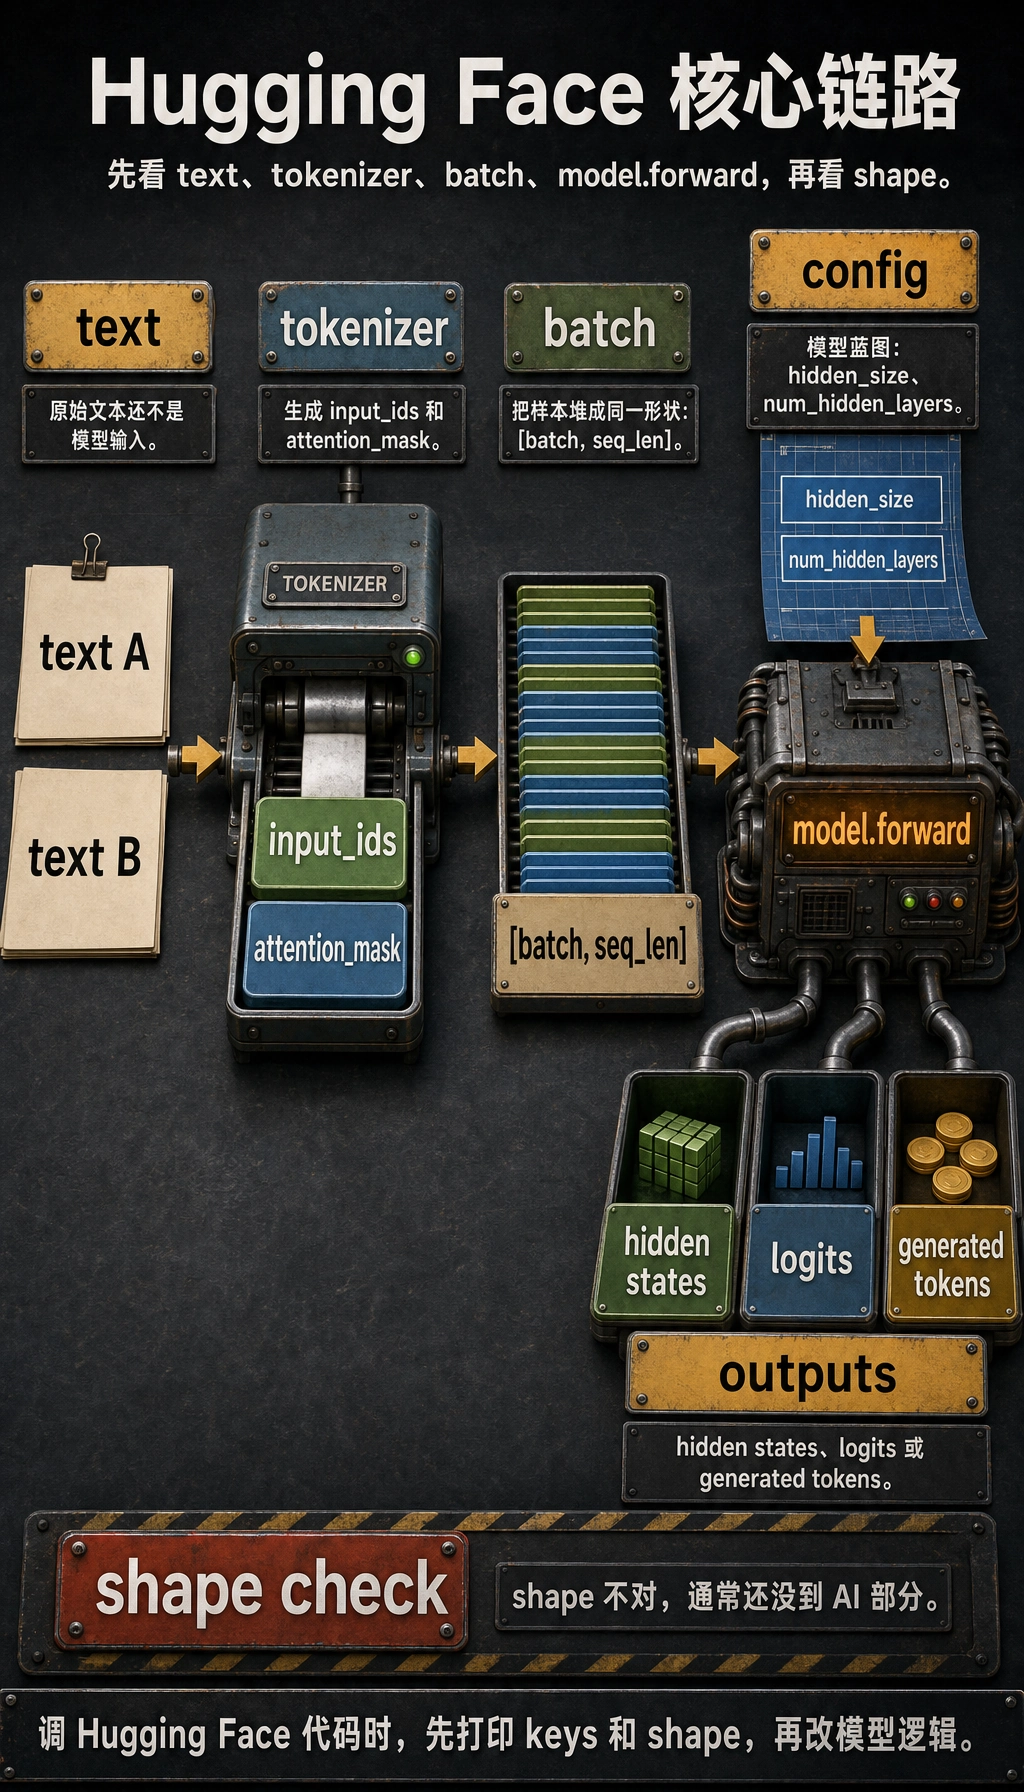
大多数 Hugging Face 示例都能还原成一条链:
text -> tokenizer -> input_ids / attention_mask -> model.forward -> hidden states / logits / generated tokens
理解这条链以后,pipeline、Trainer、DataCollator、AutoModel... 都只是便利封装,不再是神秘 API。
四个对象
| 对象 | 负责什么 | 常见字段 |
|---|---|---|
| tokenizer | 文本预处理与 token 到 ID 转换 | input_ids, attention_mask |
| config | 模型结构蓝图 | hidden_size, num_hidden_layers, vocab_size |
| model | 神经网络计算 | last_hidden_state, logits, generated IDs |
| batch | 形状统一的一批张量 | [batch, seq_len] 输入 |
最重要的习惯是检查 shape。shape 不对时,模型通常还没进入真正的“AI”部分。
实验 1:不下载权重也跑通流程
安装依赖:
python -m pip install torch transformers
这个例子用 BertConfig 创建一个很小的随机 BERT。它没有真实语言能力,但不用下载预训练权重就能看清完整调用路径。
import torch
from transformers import BertConfig, BertModel

vocab = {
    "[PAD]": 0,
    "[CLS]": 1,
    "[SEP]": 2,
    "[UNK]": 3,
    "reset": 4,
    "password": 5,
    "refund": 6,
    "order": 7,
    "please": 8,
    "help": 9,
}


def encode(text, max_length=6):
    tokens = ["[CLS]"] + text.lower().split() + ["[SEP]"]
    input_ids = [vocab.get(token, vocab["[UNK]"]) for token in tokens][:max_length]
    attention_mask = [1] * len(input_ids)

    while len(input_ids) < max_length:
        input_ids.append(vocab["[PAD]"])
        attention_mask.append(0)

    return input_ids, attention_mask


texts = ["please help reset password", "refund order"]
encoded = [encode(text) for text in texts]

input_ids = torch.tensor([item[0] for item in encoded], dtype=torch.long)
attention_mask = torch.tensor([item[1] for item in encoded], dtype=torch.long)

config = BertConfig(
    vocab_size=len(vocab),
    hidden_size=32,
    num_hidden_layers=2,
    num_attention_heads=4,
    intermediate_size=64,
)

model = BertModel(config)
outputs = model(input_ids=input_ids, attention_mask=attention_mask)

print("input_ids shape        :", tuple(input_ids.shape))
print("attention_mask shape   :", tuple(attention_mask.shape))
print("last_hidden_state shape:", tuple(outputs.last_hidden_state.shape))
print("pooler_output shape    :", tuple(outputs.pooler_output.shape))
预期输出:
input_ids shape        : (2, 6)
attention_mask shape   : (2, 6)
last_hidden_state shape: (2, 6, 32)
pooler_output shape    : (2, 32)
这样读 shape:
2表示 batch 里有两段文本;6表示每段都 pad 或截断到长度 6;32来自hidden_size=32;last_hidden_state保留每个 token 一个向量;pooler_output是这个 BERT 风格模型里每段文本一个向量。
实验 2:使用真实预训练模型
有网络时,使用 from_pretrained:
from transformers import AutoModel, AutoTokenizer

model_name = "bert-base-uncased"
tokenizer = AutoTokenizer.from_pretrained(model_name)
model = AutoModel.from_pretrained(model_name)

batch = tokenizer(
    ["please help reset password", "refund order"],
    padding=True,
    truncation=True,
    return_tensors="pt",
)

outputs = model(**batch)

print(batch.keys())
print(batch["input_ids"].shape)
print(outputs.last_hidden_state.shape)
预期形状级输出:
dict_keys(['input_ids', 'token_type_ids', 'attention_mask'])
torch.Size([2, 6])
torch.Size([2, 6, 768])

这时模型拥有预训练权重。流程还是同一条,只是 tokenizer、config 和 weights 都来自 Hub,并且必须彼此匹配。
读真实代码时的对象地图
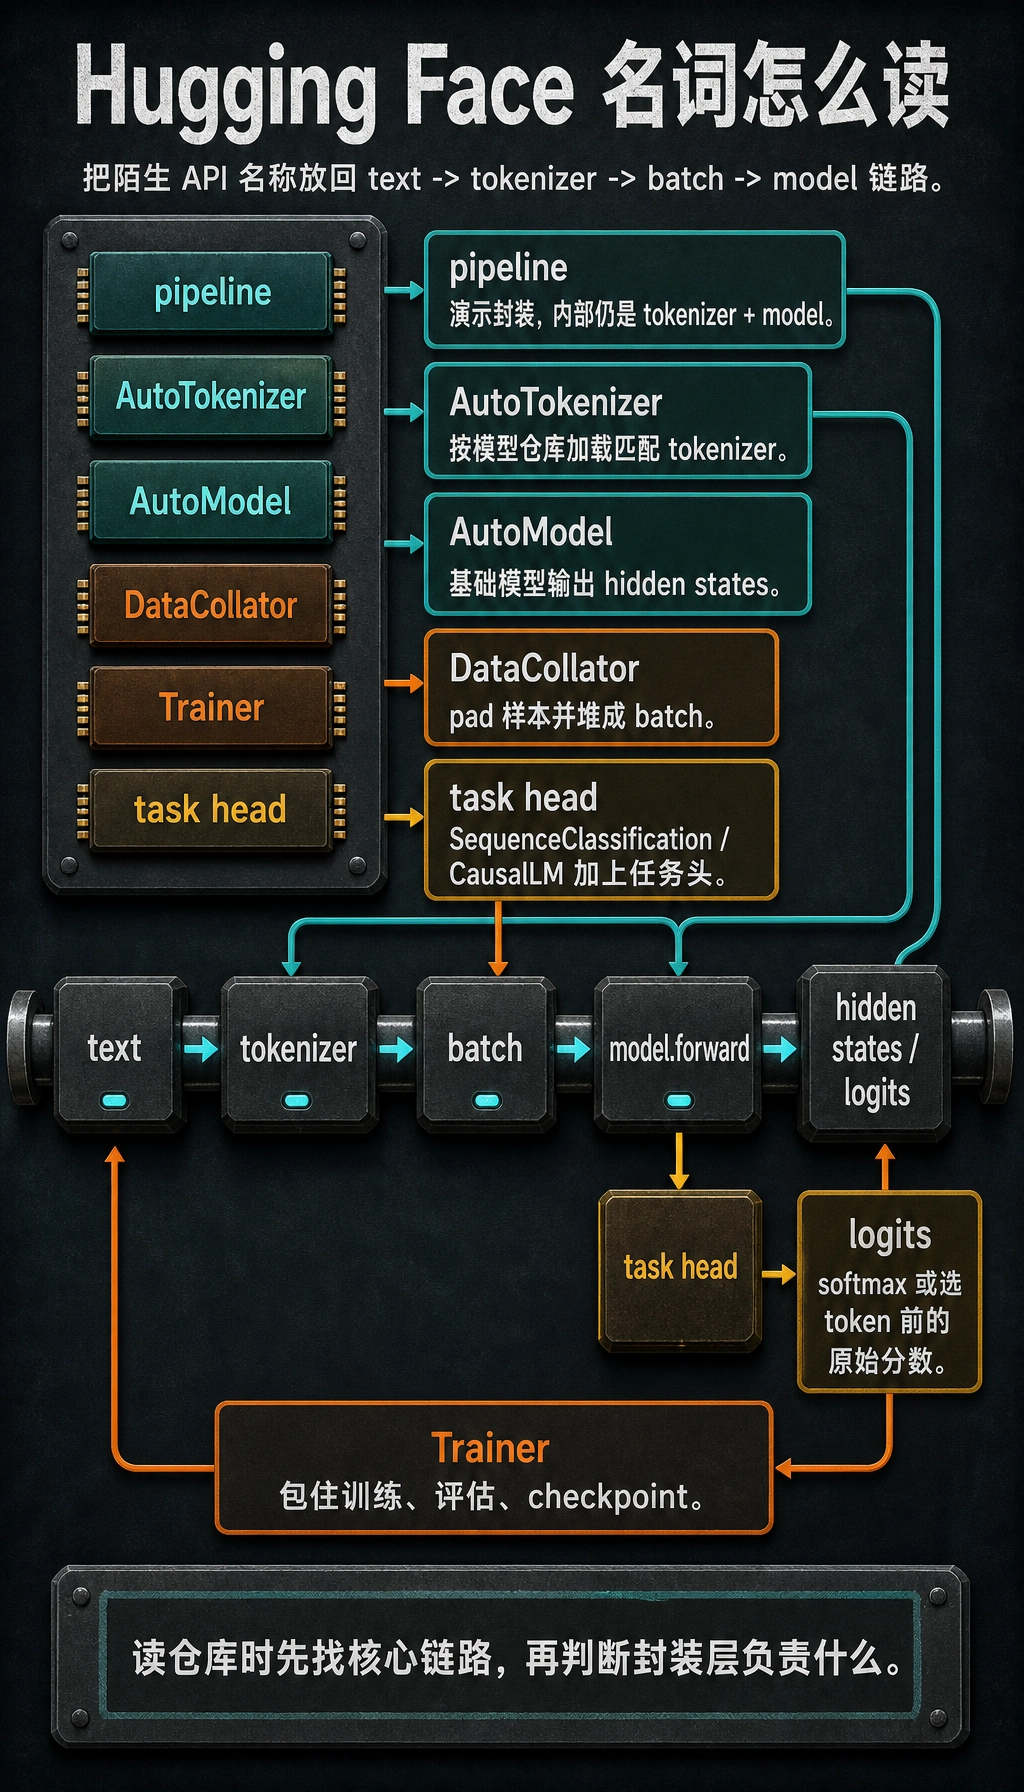
读仓库时,把陌生名字映射回核心链路:
| 名称 | 怎么理解 |
|---|---|
pipeline | tokenizer + model 的高层演示封装 |
AutoTokenizer | 根据模型仓库加载匹配的 tokenizer 类 |
AutoModel | 加载不带任务头的基础模型 |
AutoModelForSequenceClassification | 基础模型加分类头 |
AutoModelForCausalLM | 用于 next-token generation 的 decoder 类模型 |
DataCollator | 把样本 pad 并堆成 batch |
Trainer | 封装训练循环、评估、checkpoint 和日志 |
logits | softmax 或 token 选择之前的原始分数 |
排查清单
- Tokenizer 和 model 应该来自同一个模型仓库。
- 调用模型前先打印
batch.keys()和张量 shape。 - 只要用了 padding,通常就需要
attention_mask。 - 随机
BertModel(config)只用于理解接口,不是预训练模型。 AutoModel输出表示;任务专用类会输出任务 logits。- CUDA 内存报错时,先降 batch size、sequence length 或 model size,再怀疑代码逻辑。
练习
- 把实验 1 的
max_length从6改成4,哪个 token 被截掉? - 把
hidden_size=64,哪个输出 shape 改变? - 加入第三句话,确认 batch 维度从
2变成3。 - 在实验 2 中把
AutoModel换成AutoModelForSequenceClassification,会多出什么字段? - 解释为什么
pipeline()适合演示,但不足以排查 batch shape 问题。
小结
学习 Hugging Face 最稳的方法是跟着张量走:
tokenizer creates tensors -> model consumes tensors -> outputs expose states or logits
一旦能检查这条路径,官方示例就不会那么吓人。