10.5.1 高度な視覚タスクのロードマップ:OCR、顔、動画、3D
高度な視覚タスクは、モデル名のリストではありません。同じ視覚基盤の上にある応用方向で、入力、出力、制約、リスクがより複雑になります。
まず direction map を見る
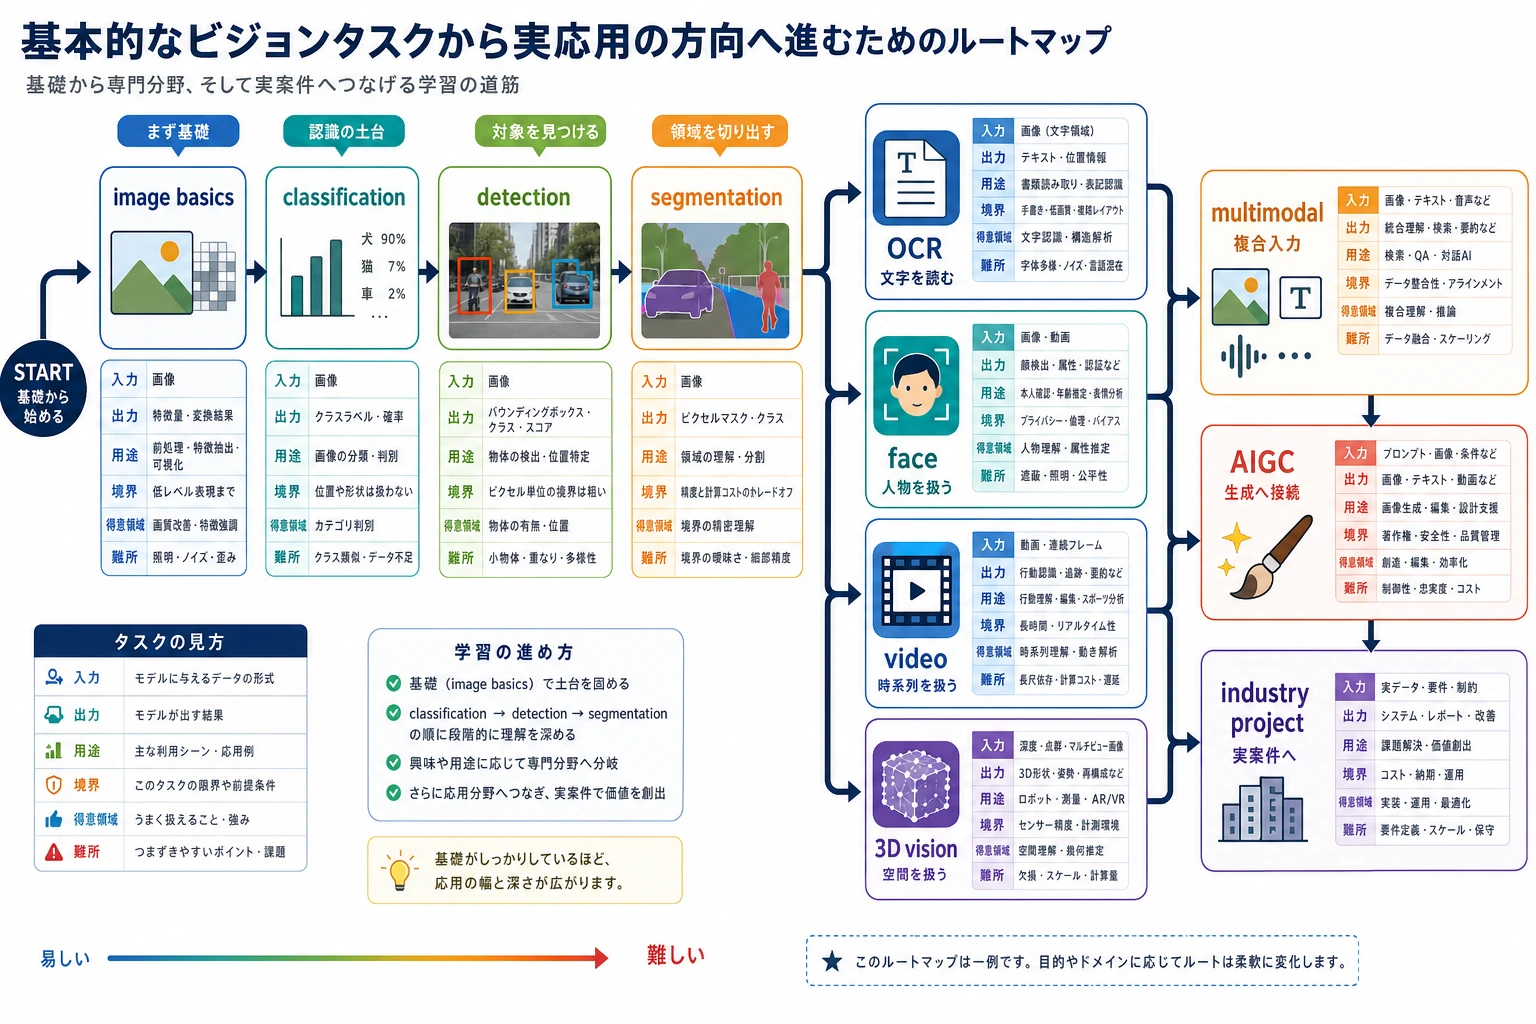
![]()
OCR は文書、顔認識は本人確認などの慎重な場面、動画は時間と動き、3D 視覚は空間構造に向いています。
Direction choice check を動かす
4 方向を浅く試すより、1 つを選びます。
requirement = {
    "input": "screenshot",
    "needs_text": True,
    "needs_identity": False,
    "needs_time": False,
    "needs_depth": False,
}

if requirement["needs_text"]:
    direction = "OCR"
elif requirement["needs_identity"]:
    direction = "Face"
elif requirement["needs_time"]:
    direction = "Video"
elif requirement["needs_depth"]:
    direction = "3D"
else:
    direction = "Classification or detection"

print("direction:", direction)
print("first_output:", "text with layout")
出力:
direction: OCR
first_output: text with layout
face、surveillance、medical、identity projects では、results を見せる前に privacy と usage boundaries を書きます。
この順番で学ぶ
| 手順 | 方向 | 実践アウトプット |
|---|---|---|
| 1 | OCR | text、layout、fields、confidence、failure samples を抽出する |
| 2 | Face | faces を検出し、threshold、privacy、bias risks を説明する |
| 3 | Video | frames をまたいで events を追跡し、temporal failures を記録する |
| 4 | 3D vision | depth、point cloud、geometry、sensor assumptions を説明する |
合格ライン
1 方向を選び、input/output を定義し、minimum project を動かし、failure cases と usage boundaries を文書化できれば、この章は合格です。